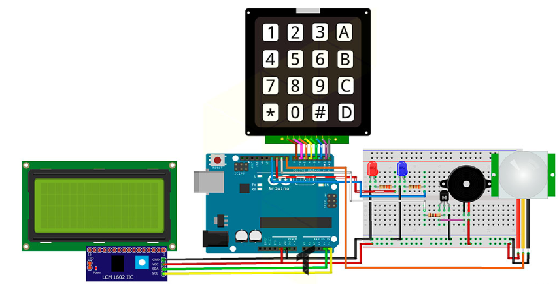
DESCRIPCIÓN
Este sistema utiliza un teclado matricial 4×4 para gestionar los comandos del sistema, un display para desplegar los mensajes de alerta, también usamos un pequeño buzzer por el cual se emiten pequeños sonidos intermitentes y unos leds que indican el estado del sistema.
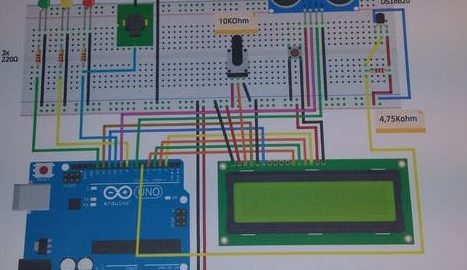
COMPONENTES
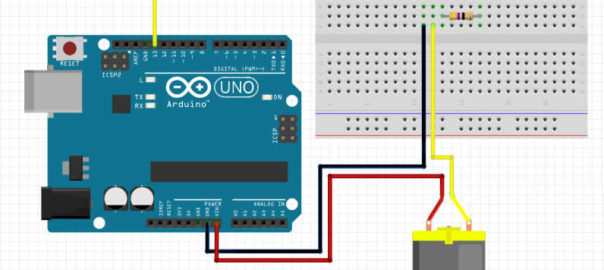
- 1 Arduino UNO
- 1 Teclado matricial 4×4
- 2 Leds, uno de color rojo y otro azul
- 2 Resistencias de 330ohms
- 1 Resistencia de 1K ohm
- 1 Transistor NPN BC548
- 1 Protoboard
- 1 Display LCD de 20×4
- 1 Módulo (adaptador) I2C
- 1 Buzzer de 5v
- 1 Sensor PIR
CÓDIGO
El código viene muy bien comentado, pero dejaremos algunos puntos que no debes olvidar.
-Instalar todas las librerías mencionadas en el proyecto, previo a esto dejamos los enlaces.
-La contraseña inicial es 1105, más adelante te mostraremos como modificar sus parámetros.
-En la función keypadEventT(KeypadEvent keyT) hay una sentencia if como la siguiente: if (passPositionT >= 5), si deseas aumentar el número de caracteres de la contraseña, entonces, debes modificar el número por el nuevo número total de caracteres más 1, es decir, si tu nueva contraseña contiene 8 caracteres deberás poner lo siguiente: if (passPositionT >= 9).
-Dentro de la instancia Password passwordT = Password(«1105») se almacena la contraseña, aquí es en donde puedes cambiar la contraseña.
-Recuerda que para activar/desactivar la alarma debes presionar el botón «#».
-Dentro de la función blockedSystemT() hay un ciclo for que otorga un tiempo de espera de 10 segundos antes de que se active la alarma, puedes aumentar o acotar este tiempo modificando el parámetro que lo inicia. Por ejemplo, si solo requieres 5 segundos de espera quedaría así: for (uint8_t iT = 5; iT > 0; iT–).
Teniendo claro los principales puntos, aquí el código.
//Declaration of waiting time variables between functions.
const uint16_t delayFunctionT = 1000, intervalT = 400, delayLedT = 50;
unsigned long previousMillisT;

//They start in a state under the variables that control the system.
uint8_t passPositionT = 0, speakerStatusT = LOW, ledStatusT = LOW;
bool alarmStatusT = false, alarmActiveT = false, motionDetectionT = false;

//Declaration of the keypad pins, LEDs, motion sensor and buzzer.
const uint8_t colsT = 4, rowsT = 4;
const uint8_t colPinsT[colsT] = {3, 2, 1, 0}, rowPinsT[rowsT] = {7, 6, 5, 4}, pirPinT = 8, speakerPinT = 9, ledRedPinT = 10, ledBluePinT = 11;
const char keysT[rowsT][colsT] = {
  {'1', '2', '3', 'A'},
  {'4', '5', '6', 'B'},
  {'7', '8', '9', 'C'},
  {'*', '0', '#', 'D'}
};

//Instances of the lcd, password and keypad objects. The password is "1105", you can
//change it by any combination of 4 digits.
LiquidCrystal_I2C lcd(0x27, 20, 4);
Password passwordT = Password("1105");
Keypad keypad = Keypad( makeKeymap(keysT), rowPinsT, colPinsT, rowsT, colsT );

void setup() {
  lcd.begin();
  //Pin configuration.
  pinMode(speakerPinT, OUTPUT);
  pinMode(ledRedPinT, OUTPUT);
  pinMode(ledBluePinT, OUTPUT);
  pinMode(pirPinT, INPUT);
  digitalWrite(ledBluePinT, HIGH);

  //Start message with 3 seconds wait.
  lcd.setCursor(0, 0);
  lcd.print("Sistema de seguridad");
  lcd.setCursor(0, 1);
  lcd.print(" proyecto-teos.com");
  delay(3000);
  previousMillisT = millis();
  keypad.addEventListener(keypadEventT);
  blockingMessageT();
}

void loop() {
  //If the alarmActiveT variable is in a high state and the pirPinT detects movement,
  //it will call the motionDetectedT function. The motionDetectionT function triggers
  //the buzzer's sonar.
  keypad.getKey();
  if (alarmActiveT == true && digitalRead(pirPinT) == HIGH)
    motionDetectedT();
  if (motionDetectionT)
    digitalWrite(speakerPinT, speakerAlarmT());
}

//keypadEventT registers the events of the keyboard.
void keypadEventT(KeypadEvent keyT) {
  switch (keypad.getState()) {
    //When typing "#" or entering more than 4 characters the function will be
    //called checkPasswordT.
    case PRESSED:
      if (passPositionT >= 5)
        checkPasswordT();
      lcd.setCursor((passPositionT++), 2);
      switch (keyT) {
        case '#':
          checkPasswordT();
          break;
        default:
          passwordT.append(keyT);
          lcd.print("*");
      }
  }
}

//If the password is correct and the alarms are deactivated, then it will call the
//blockedSystemT function, if the password is correct and the alarms are activated,
//then it will call the unlockSystemT function, contrary to all this it will be called
//the incorrectPasswordT function, which is when introduced an incorrect password.
void checkPasswordT() {
  if (passwordT.evaluate()) {
    if (alarmActiveT == false && alarmStatusT == false)
      blockedSystemT();
    else if (alarmActiveT == true || alarmStatusT == true)
      unlockSystemT();
  }
  else
    incorrectPasswordT();
}

//Function that indicates that an incorrect password has been entered.
void incorrectPasswordT() {
  passwordT.reset();
  passPositionT = 0;
  digitalWrite(ledBluePinT, LOW);
  //An incorrect password message is sent.
  lcd.clear();
  lcd.setCursor(0, 0);
  lcd.print("Clave incorrecta");
  //Using the ternary operator will turn on or off a led.
  for (uint8_t iT = 1; iT <= 8; iT++) {
    ledStatusT = (ledStatusT) ? LOW : HIGH;
    digitalWrite(ledRedPinT, ledStatusT);
    delay(delayLedT);
  }
  //The following conditions will serve to return the state of the LED.
  if (alarmActiveT == false && alarmStatusT == false) {
    digitalWrite(ledRedPinT, LOW);
    digitalWrite(ledBluePinT, HIGH);
    delay(delayFunctionT);
    blockingMessageT();
  }
  else if (alarmActiveT == true || alarmStatusT == true) {
    digitalWrite(ledRedPinT, HIGH);
    digitalWrite(ledBluePinT, LOW);
    delay(delayFunctionT);
    unlockMessageT();
  }
}

//Function that shows motion detection.
void motionDetectedT() {
  //Activate the alarms and restart the password.
  motionDetectionT = true;
  alarmStatusT = true;
  passwordT.reset();
  passPositionT = 0;
  //Send a message that movement has been detected, also indicated by LEDs.
  lcd.clear();
  lcd.setCursor(0, 0);
  lcd.print("Movimiento detectado");
  for (uint8_t iT = 1; iT <= 8; iT++) {
    ledStatusT = (ledStatusT) ? LOW : HIGH;
    digitalWrite(ledRedPinT, ledStatusT);
    delay(delayLedT);
  }
  for (uint8_t iT = 1; iT <= 8; iT++) {
    ledStatusT = (ledStatusT) ? LOW : HIGH;
    digitalWrite(ledBluePinT, ledStatusT);
    delay(delayLedT);
  }
  digitalWrite(ledRedPinT, HIGH);
  digitalWrite(ledBluePinT, LOW);
  delay(delayFunctionT);
  unlockMessageT();
}

//Function that blocks the system.
void blockedSystemT() {
  passwordT.reset();
  passPositionT = 0;
  digitalWrite(ledRedPinT, HIGH);
  digitalWrite(ledBluePinT, LOW);
  //10 seconds of tolerance are given for the system to activate.
  for (uint8_t iT = 10; iT > 0; iT--) {
    lcd.clear();
    lcd.setCursor(0, 0);
    lcd.print("Quedan ");
    lcd.setCursor(7, 0);
    lcd.print(iT);
    lcd.setCursor(9, 0);
    lcd.print(" segundos");
    lcd.setCursor(0, 1);
    lcd.print("para que se active");
    lcd.setCursor(0, 2);
    lcd.print("el sistema");
    delay(delayFunctionT);
  }

  alarmActiveT = true;
  lcd.clear();
  lcd.setCursor(0, 0);
  lcd.print("Sistema Activo");
  delay(delayFunctionT);
  unlockMessageT();
}

//Function that unlocks the system.
void unlockSystemT() {
  //The alarm states change to a low state.
  alarmStatusT = false;
  alarmActiveT = false;
  motionDetectionT = false;
  passwordT.reset();
  passPositionT = 0;
  digitalWrite(ledRedPinT, LOW);
  digitalWrite(ledBluePinT, HIGH);
  digitalWrite(speakerPinT, LOW);
  lcd.clear();
  lcd.setCursor(0, 0);
  lcd.print("Sistema desactivado");
  delay(delayFunctionT);
  blockingMessageT();
}

//The next two functions show messages on the screen.
void blockingMessageT() {
  lcd.clear();
  lcd.setCursor(0, 0);
  lcd.print("Digite su clave para");
  lcd.setCursor(0, 1);
  lcd.print("activar el sistema");
}

void unlockMessageT() {
  lcd.clear();
  lcd.setCursor(0, 0);
  lcd.print("Digite su clave para");
  lcd.setCursor(0, 1);
  lcd.print("desactivar la alarma");
}

//This function returns a high or low state that is assigned to the buzzer.
uint8_t speakerAlarmT() {
  //Using the millis function we can execute functions in "background".
  unsigned long currentMillisT = millis();
  if ((unsigned long)(currentMillisT - previousMillisT) >= intervalT) {
    previousMillisT = millis();
    return speakerStatusT = (speakerStatusT) ? LOW : HIGH;
  }
}-
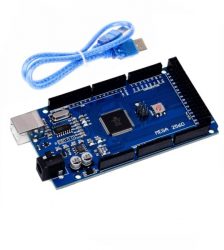 Arduino ATmega 2560 R3¡Oferta!
$20.50$19.00 -
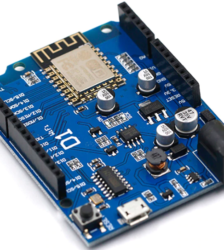 Arduino Uno Wifi¡Oferta!
$15.00$13.00 -
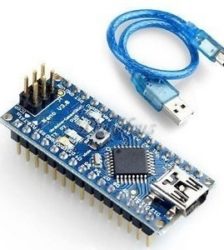 Arduino Mini USB Nano V3.0 CH340 Chip Board 5V 16M + Cable¡Oferta!
$10.00$9.50


Al momento de querer verificar la programación me manda un error «Password Password does not name a tpye» y antes de eso me mandaba el error de no se pudo verificar con el arduino a utilizar. Me podría ayudar con ello?
Jonathan Huerta: en el codigo debes colocar en la seccion de include lo siguiente:
#include
#include
Para lo que antes debes descargar las librerias en .zip desde:
https://playground.arduino.cc/Code/Keypad/#Download
https://playground.arduino.cc/Code/Password/#Download
Y luego instalarlos desde el IDE en el menú Programa > Incluir librería > Añadir Biblioteca ZIP
arriba donde dice #include dos veces debe decir:
#include *menor que*Keypad.h*mayor que*
#include *menor que*Password.h*mayor que*
OBVIO QUE DONDE DICE *mayor que* ES EL SIMBOLO DE TU TECLADO IGUAL CON EL OTRO
/https://github.com/fdebrabander/Arduino-LiquidCrystal-I2C-library ESTA TAMBIEN TIENES QUE INSTALARLA
Tengo un problema, al compilar me manda que “password does not name a type” dandome a entender que no es una salida pero en si no entendi